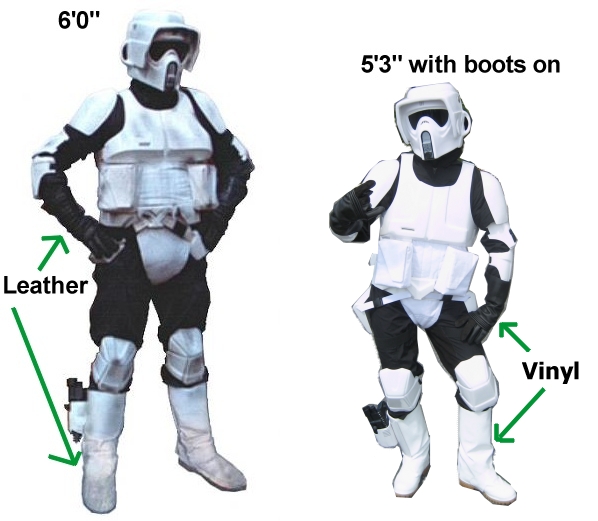
Don't wear leather? Not a 6'0" male? No problem!
Biker Scout quazi-tutorial for the Vegan & vertically-challenged
In memoriam Mandy Crooks, animal lover and all around great person
December 5, 1976 - May 23, 2007
Updated: 5/26/2007-Completed
I've been doing Rebel and Starfleet costumes for years, tailoring the fabric to fit my smaller frame. But when it came time to purchase pre-made, one-size armor: Houston, I have a problem! I'm a 5'2", 118lb female, who doesn't wear animal products. With the help of two huge supporters of the Pathfinders (Ghst915 and ladyghst915), I am bent on completing proportionate & animal friendly Biker Scout gear!
Because I'm lazy, I'm not going to make nifty links and whatnot on this page to navigate easier. So you'll just have to deal and scroll :P
WHAT YOU NEED
All parts for the costume (check out BikerScout.net for specifics), a Dremel, a Heat Gun for molding just about everything to your body (a hairdryer might work...), and lots of time :P
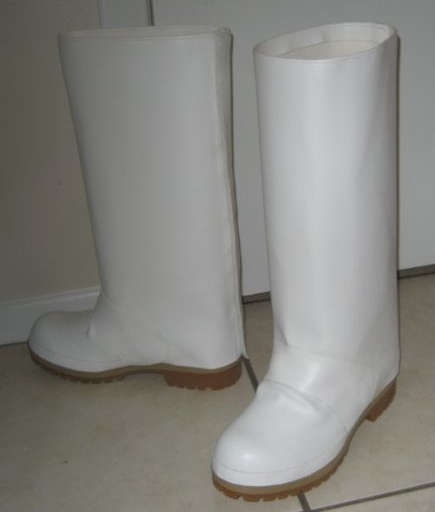
BOOTS
I've pretty much done this costume from the bottom up (as ladygst915 put it so eloquently). I started by getting a pair of work boots from Payless (they do come in kids sizes if needed), just make sure the tag said "All Man-Made Materials", which mine did. We did the pair in a matter of hours: putting the vinyl on, heating it up, stretching it, etc. It was a little tough, since that size didn't give him the usual working area as his normal order of size 11s that he does, but we made it work and they came out great :)
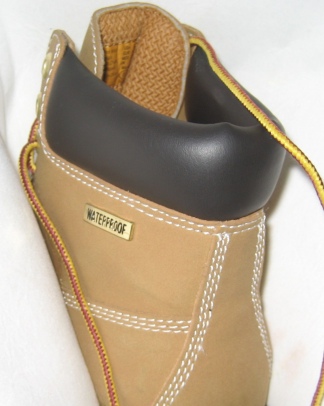
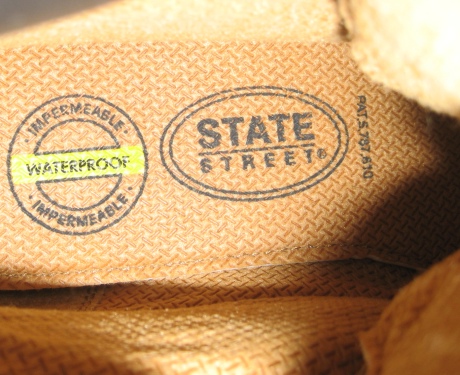
ABOVE: Pics of the Payless animal-friendly workboots
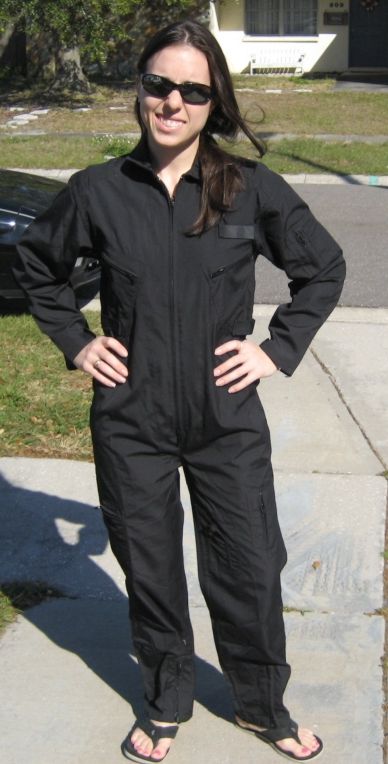
FLIGHT SUIT
I tried on the XS at a military shop, and lemme tell ya, 2 of me could have fit in it! I did not feel like performing major sewing-surgery on the suit, so I did some shopping. ArmySurplusForLess carries kids sizes: https://secure.armysurplusforless.com//productView.php?id=666 I got a kids large and it fits great.
As for the mods to it, I won't go into great detail, because none of them are size specific-it was just removing zippers, etc. and the micro-suede patch was placed (that was done after the pic below was taken). I found the black micro-suede at JoAnns in the upholstery dept. It was $19.99/yd, compared to the $54.99/yd for the cow-carcass, so make sure you find the $19.99/yd large roller, because that is the fake stuff.
GLOVES
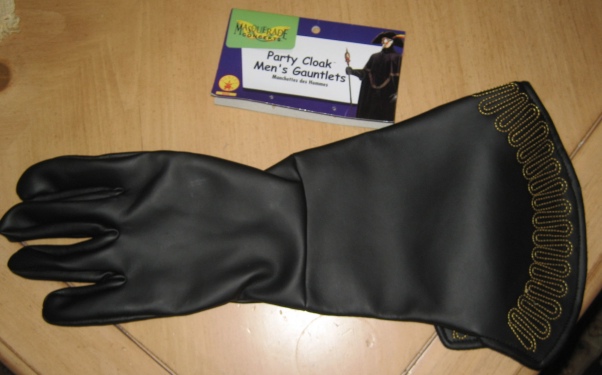
These presented a challenge: the "well-known" biker gloves are all leather, so the only option was to make them myself. You will need 2 pairs of these "Party Cloak Men's Gauntlets" from the seller masqueradelady on eBay. If you can find them somewhere else, or a like-pair of vinyl gloves, that's ok, too, but she was great and FAST shipping!
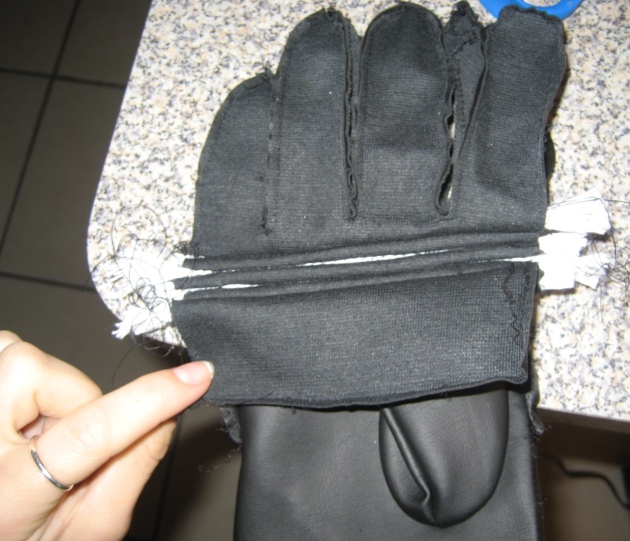
After getting the gloves, time to start performing surgery. Basically, take the gauntlet part off, and use hem-cutters to go up both sides of the palm area. You'll nee some cotton ribbing to form the 4 ridges on the top of the glove. Turn the glove inside out, and place & sew in the ribbing one rib at a time.
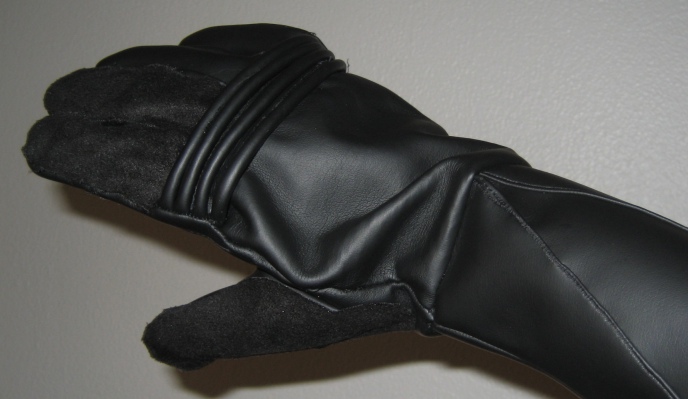
When done, sew up the sides again, and make the 'V' on the gauntlet slowly, then attach it to the main part of the glove. Use some GOOP to glue the fake micro-suede to the appropriate areas and you're done!
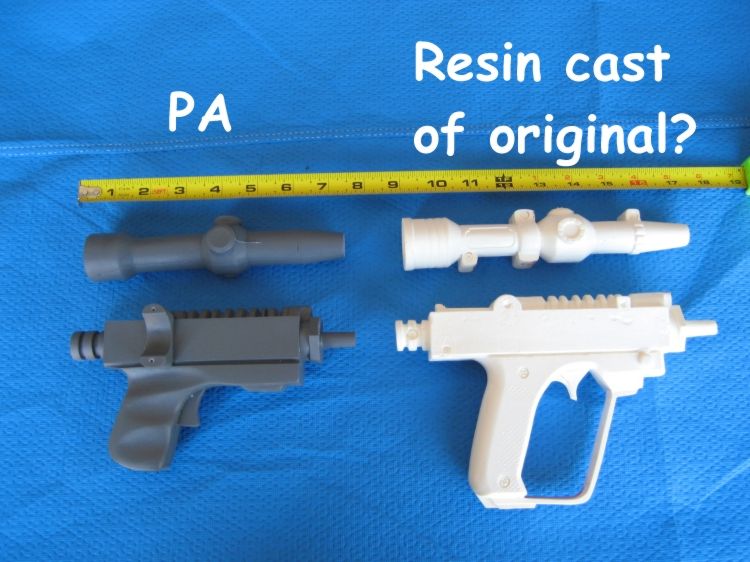
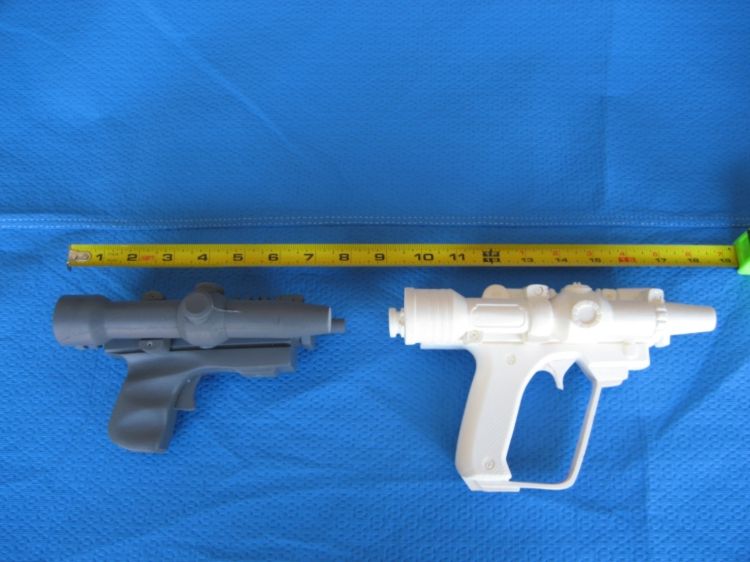
BLASTER
I had gotten a from what I can tell, "normal size" blaster (the white one in the pics below). It is believed to be a resin cast of the original, since it is ever-so slightly smaller than the Kenner. However, I also ordered a blaster from Polymer Armory, which I read somewhere else that theirs was the "most screen accurate size" blaster, but it is significantly smaller than the resin one I had. But acquiring smaller versions of things is what this project all about :P So if you want a proportional blaster, go with the PA!
Holster: I didn't like the holster my armor came with, so I ordered a holster from SC. We asked them NOT rivet the holster together, because the blaster is smaller (SC's are made to fit the Kenner blaster, not the PA one above that I ended up going with). I heated up the ABS on the holster and molded it around the PA blaster and riveted to the boot. Also had to put foam in there to keep it from falling out while marching :)
ARMOR
All of it is about the same size, so no matter which set you get, you're going to have to mod the crap out of it! There is a seller of kid's armor, but from the photos, it looks like a 7yr old is wearing it, so I'm thinking it's a little to small for me...but if you're a REALLY small person, that might be the way to go!
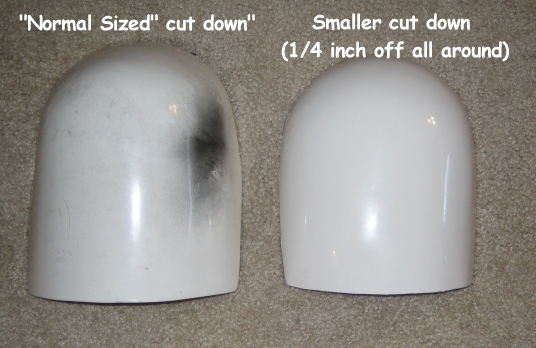
Shoulders: After cutting off all the access from the mold on the left, you get the piece on the right. But at that point, the bell comes almost to my elbow-which is no good, because it covers the bicep piece. So...you guessed it, the modding begins! In the pic below, the excess has NOT been cut off yet on the right, that is the 'normal sized' cut down.

Below is the pic after tailoring it to my size.
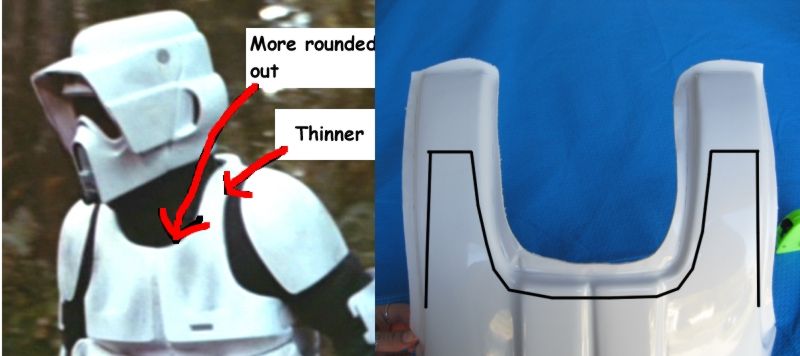
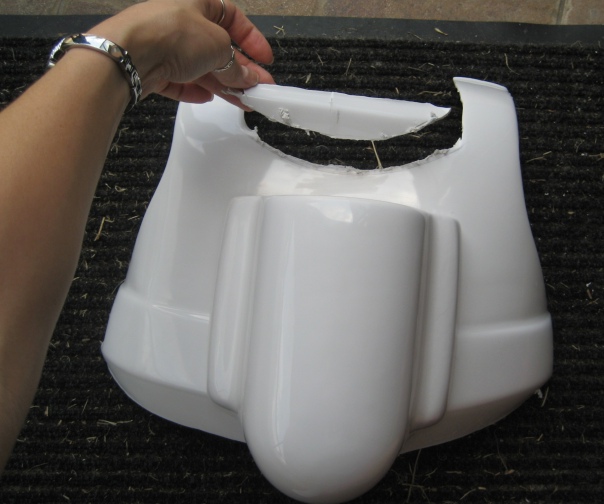
Chest plate: This will probably be the most intense piece to mod. After an extremely rough cut out of the box, we have the pic below of me holding it. I'm not even holding it up as high as it should be, and as you can see, the plate is sticking a good 4-5 inches over my shoulders & the front is almost to my neck! (if I were holding it where it should be, I'd almost be choking myself). This cast is also "boxy" and not really rounded out at the neckline (somewhat hard to tell from this pic).
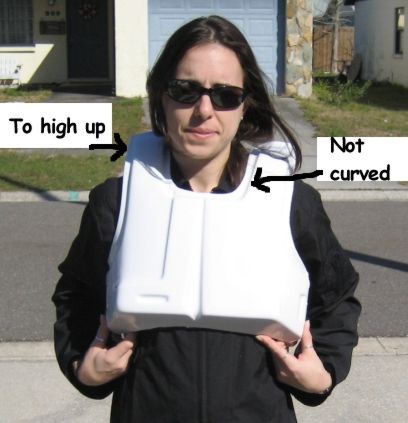
To get the shoulder area down, it will be trimmed significantly and heated with a Heat Gun to bend it towards my back and meet the back piece. The neck line will also be trimmed up a bunch so it rests lower, as well as the sides (you can see a rough line of how this will be accomplished).
After we finished cutting it down, the neck area became more rounded and lower, because when I was pulling it up to where it should be on me, I was being choked (see above pic).
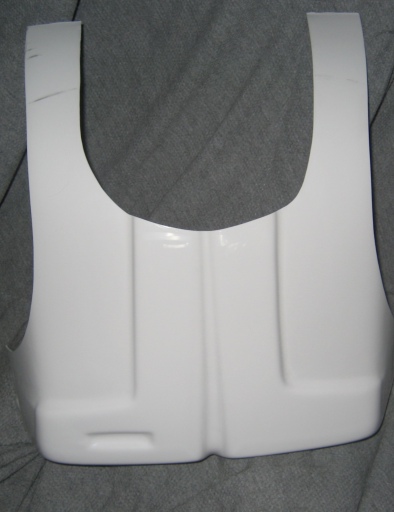

Backpack: As you can see from the comparison below (used with TB-4120's permission), the "Mystery M.G.?" backpack is definitely the smallest of the bunch, and also happens to be the armor I purchased :) Though some mods will still have to be completed on this piece, I do not think it will be as intense as the chestplate.

***You can see the complete armor-comparison thread at the BSN boards that TB-4120 did, it's awesome!
As you can see, it still sticks out a little too far horizontally, and also, comes right up into my armpit! Darn tall people! :P So by trimming approximately to the black line in the photo, that should work. It will also make the outter edges on a steeper, more vertical line like the other backpacks in the photo above.

Did you buy that heatgun I suggested at the beginning? I hope so, cuz you're about to really break it in between the backpack and the random armor pieces! I didn't actually use a setting, but as you can see, lots of lights are on, so I guess it's a high setting. Just sweep it back and forth, evenly heating the plastic.
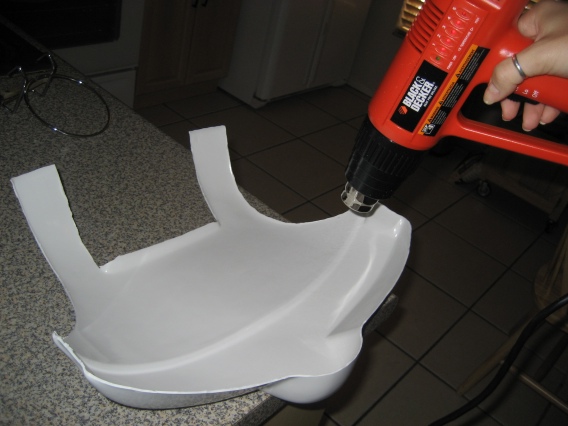
First I did the shoulder areas and straightened them out (they were curved in so much, it wasn't hanging correctly). When it's evenly heated, start bending. Yes, the bottom will bow out some, but we'll fix that later.
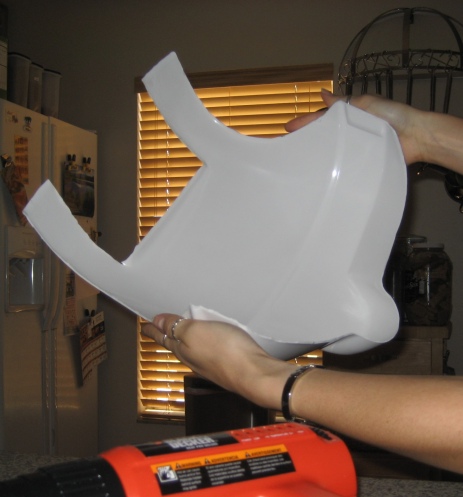
After it's cooled off, time for the upper part trimming. As you can see from the comparison of all the backpacks above, and also screenshots, you'll notice the neckline is almost even with the 'hump' part, so here's a rough trim of what I'm going for:
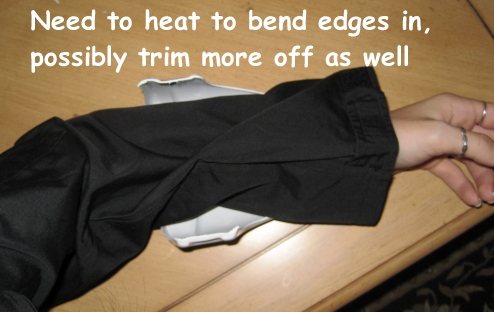
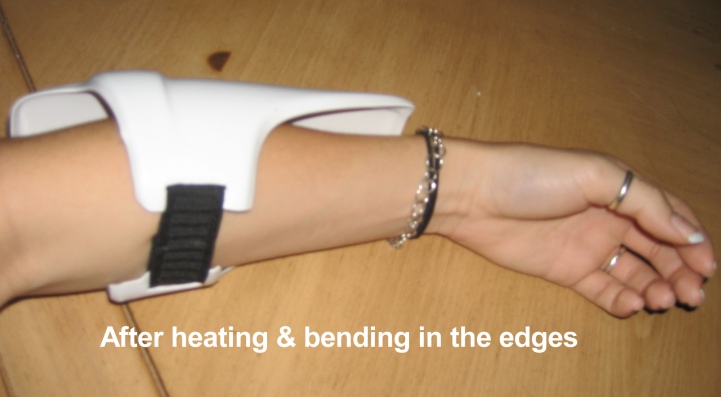
Random armor pieces: Most of these will just have to be heated with the heat gun and molded to me, others will need additional trimming and molding.
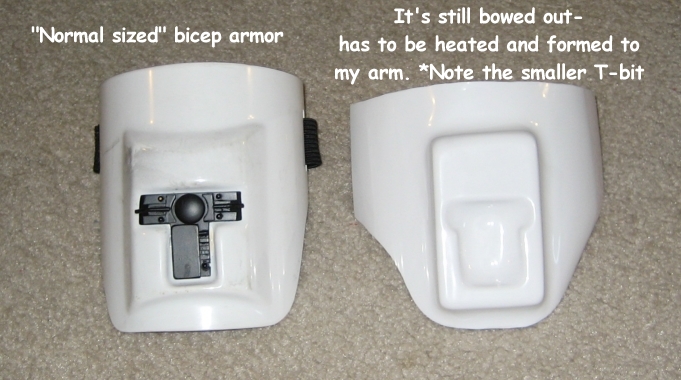
Bicep armor: after smaller-sized cut down. It was a good 1/2 inch taken off the top to accommodate my shorter humerus :) This armor also has smaller T-bit spots, another good thing for us!
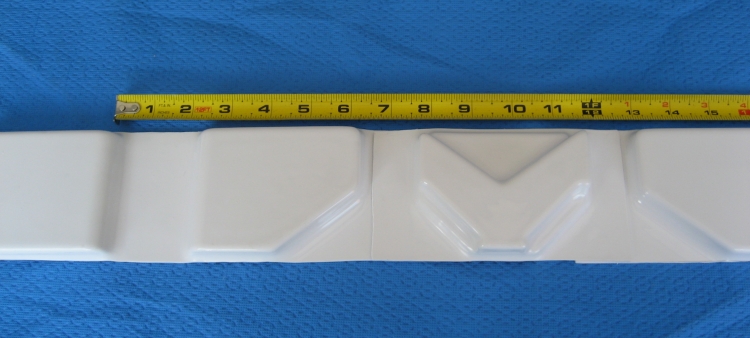
Belt: I originally thought that this piece wouldn't have to be modded, but after quazi-wrapping around me...yeah...it almost goes around me, and doesn't end on the sides where it should. The front part of the belt is put together quite tightly (only 1.25 inches apart), but the end boxes might have to be cut-off and re-attached (they are currently 2.25 inches apart) so that it makes the belt shorter, so it falls where it should.
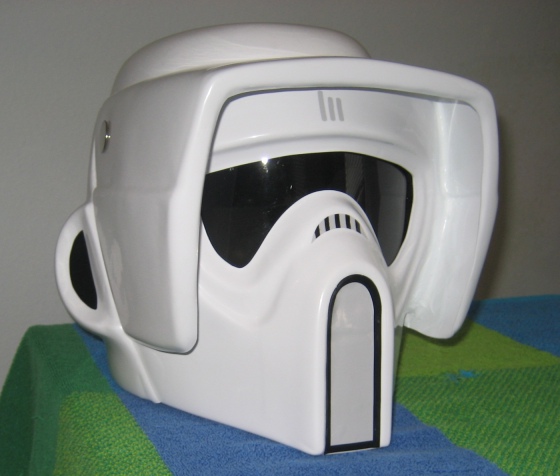
Bucket
Nothing really to mod here. I got the KS helmet kit and put it together myself (I'm waiting for a hollowed-out snout piece from MC, that's why that's missing...)
Questions/Comments? Hit me up